
 |
| Grabs some spray cans and just call it an art car. Photo source: Wide Walls |
I had a middle aged guy come by the house to buy some Datsun parts, he took one look at my '70 Mustang in the driveway, and disdainfully said "Is that one of those ninety nine dollar paint jobs?" "No" I replied, "Those hundred dollar paint jobs cost five hundred dollars now." True enough, a quality new paint job now costs so much that for most cars it just can't be justified. Plan on spending almost ten times this much, for a "show quality" respray.
So what can you do? Obviously a new paint job would be nice, IF, If you had the money, and time, IF you really liked the car and were planning to hold onto it for a few years, IF you really care what Jokers like that guy think. Still, you want to drive a nice car, a Better Beater. The goal is to improve the aesthetics of your car so that its a solid ten (or twenty!) footer. There's a lot you can do to improve the looks of your car on the cheap, which is of course the whole idea. Of course the better car you start out with, the better results you can obtain.

This was what I started with on my Explorer. Obviously the previous owner either scraped up against a pole, or something else came up to it and scratched it up. Either way the damage is only superficial and cosmetic. My goal was just to touch up the scratches and make them a little less noticeable.
You can use that almost matching "Touch up" paint, those little bottles and spray cans. I bought a spray can of blue paint to touch up some scratches on the right rear door of my Explorer. I sprayed the paint into a paper cup until I had a big enough puddle. Lacking a painter's brush I used the next best thing, a Q-tip. Actually several Q-Tips, but they're cheap and right in my bathroom. The scratches were kind of deep and the panel is dented a bit, but I just wanted to help the area blend in. A couple of coats later I was quite satisfied. After it had dried I hit the area with an application of Meguiar's cleaner wax.
 |
| Not too bad. |
 |
| At least now the scratches doesn't reach out and grab your eye. |
Custom matched paint cans are available. Not a bad idea if your car is not too faded out, or you want to paint the door jams and around the trunk and hood. These are usually matched to a paint code, so they might not match exactly. If you live close enough to the provider you might drop buy and see if they can custom match your color. This might be a good idea of you are replacing a door or another large panel. Actually most body shops can match your current paint by tweaking the formula a bit to cover for fading. A pint of real paint will probably be kind of expensive, and unless you have a spray set up, hard to use. They do sell these aerosol powered paint spray guns that can use your "real paint " if you have the skill.

Oxidized clear coat, What to do? This localized paint failure is very common. It makes your car look tired and old. Well my cars are old, I just don't want them to look so tired. Kind of like getting rid of the bags under my eyes, even temporarily!
Speaking of tired eyes here's some before and after shots of my headlights. Meguiar's to the rescue.
 |
| Tired looking eyes come with the years. |
 |
| Now it looks more alert. And more youthful somehow. |
The usual response to these oxidized areas is to use some polish to buff out the area and add some needed shine. The problem is that the oxidized area on newer cars is usually the clear coat. Once it's turned white and chalky it's pretty hard to blend it in to the rest of the paint. My Mustang had an oxidized area on the top side of the rear bumper and a really odd, oxidized and "thin" paint area on he left rear quarter panel behind the driver's door. Now, it was like that when I bought it. I don't know how that happened, either this area was struck by the sun when the car was parked under a carport, or maybe the driver had to squeeze through a tight space to get into the driver's seat, abrading the paint over time.
 |
| You can see the oxidation on the top of the bumper. |
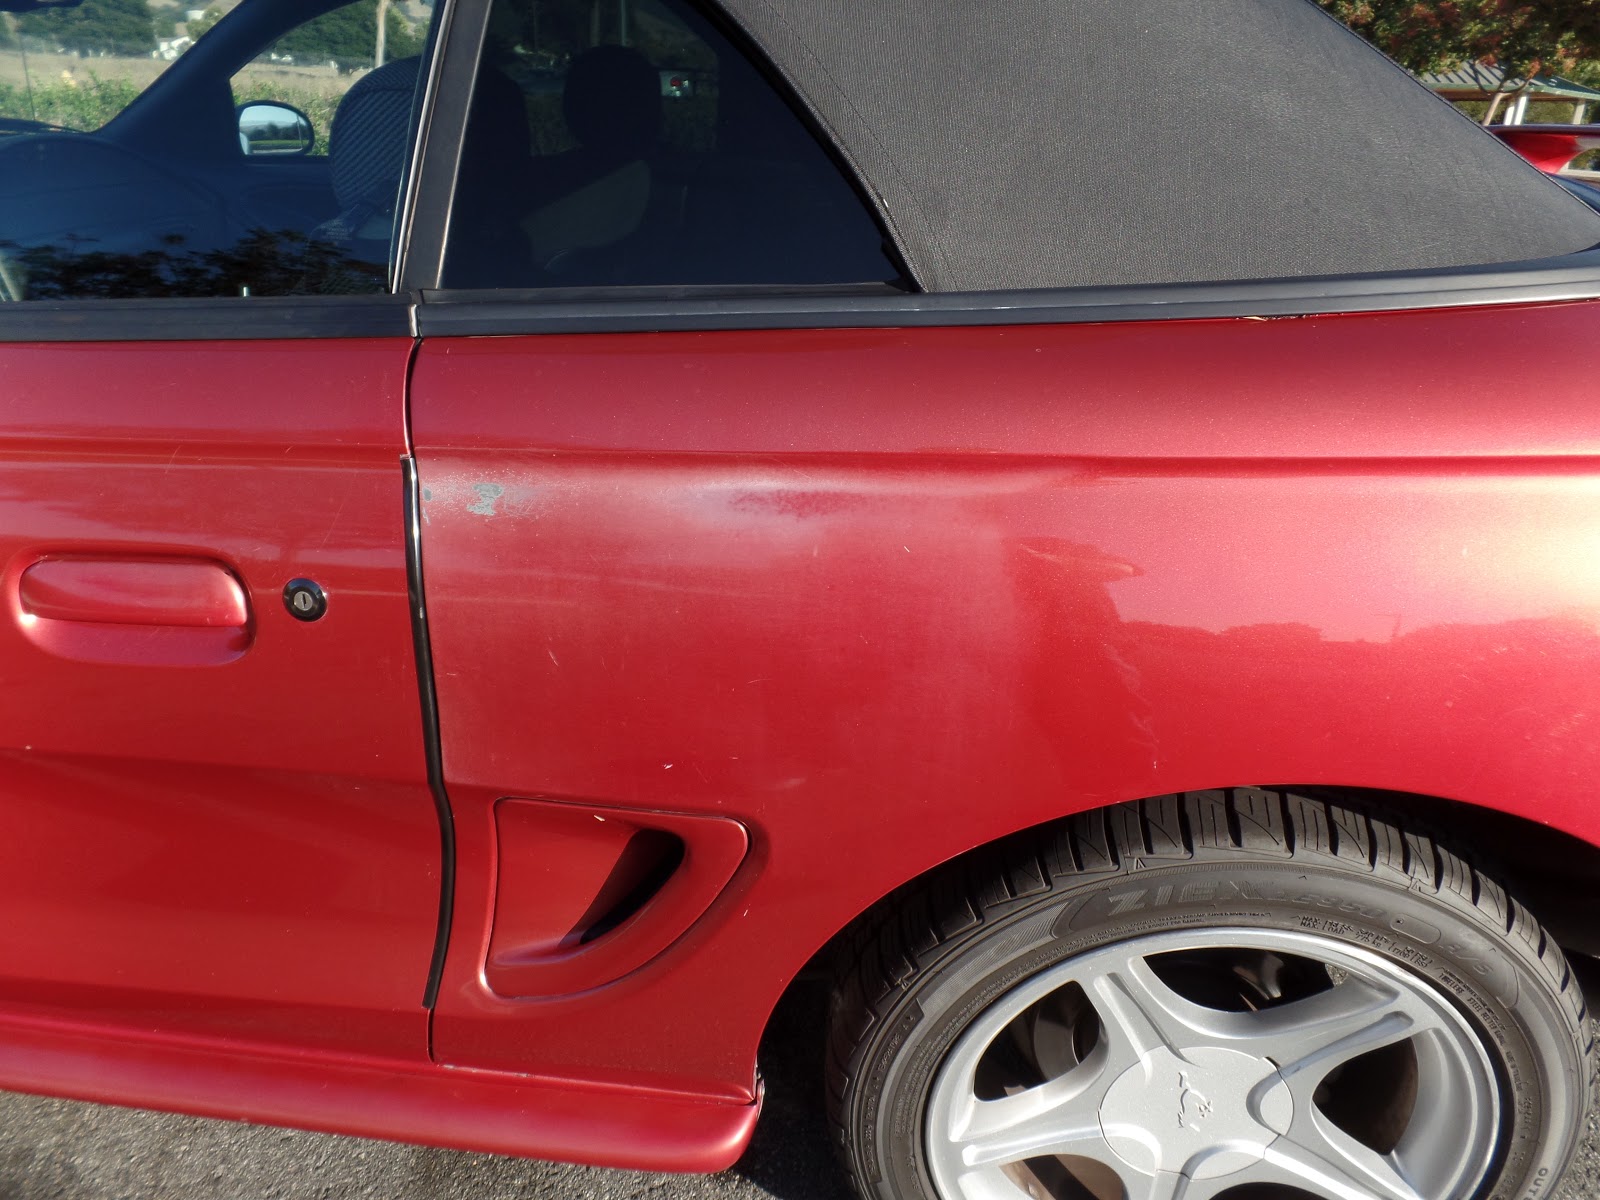 |
| This is that strange thin spot. The dull area really stands out. |
I would use Meguiar's cleaner wax on both spots and it used to do a pretty good job shining up these spots when I first got the car. However after five or six years even that wasn't working too well. (The car is over twenty years old!) The rest of the car is definitely faded from it's original Laser Red hue. It's kind of fading down to a kind of persimmon orange/red color. Overall the look is pretty even. Those are actually the only real bad spots. The body shop in Fremont has a yearly bumper painting special. but then the bumpers would look much better than the body. I thought about trying to touch up these spots with matching "touch up" spray paint but I know how hard it is to get a good result. the re-painted spots would probably look like some one "tagged" my car.
So I polished these spots using Meguiar's #2 polish. The result wasn't too bad. Especially if you don't look too closely. I would usually then add a coat of Meguiar's cleaner wax. That's my "go to" stuff for polishing pretty much everything, paint, headlamps, tail lamps, emblems, etc. Not this time though.
 |
| The results are kind of like Armor All but they are supposed to last for awhile. The twenty dollar miracle? |
I had seen a product at Orchard Supply Hardware awhile back. It was from Rustoleum, called Wipe New Recolor. Pictured on the box is an old weathered plastic patio chair. One side dull as dirt, the other side is looking almost brand new. I had seen the television commercial once, and thought it might have applications in the low buck, old car world. If you wet the oxidized areas the water causes the finish to appear shiny, hiding the paints weathering. That's why those post wash, wet shots are featured in so many Craig's Lists ads. Remember how "Armor All" did that to interior plastics as well as make the seats slippery as ice. The problem was that the Armor All would wear off fairly quickly. This new product promised to rejuvenate the finish and last up to a year. So after polishing I applied this Recolor to the top of the bumper and the left quarter panel. The bumper looked better immediately as the weathered paint was moisturized by the product. It appeared to remain with a "wet look" after it dried. Not too bad! Because the area is now shiny it has reflections that blend in with the rest of the body. The quarter panel looks pretty good too. From ten feet away the car looks very good. The car is in pretty good shape so the whole presentation is very positive. And that is what I was looking for. I might have the car painted in the future if I decide to keep it, but for now this seems like a satisfactory repair for only twenty bucks! This material is even better suited for newer cars that have a lot of black or grey plastic trim. The entire grille and upper bumper cover of my F150 is black plastic. As are the mirror housings and bed trim. I'm sure that this would work great on those areas. I had thought about trying some acrylic floor "wax" instead of using this product, but thought I would give this a try. I will report how this material holds up over time.
 |
| The top of the bumper looks kind of shiny. |
 |
| Close up you can still see the rough surface. But at least it is shiny. |
 |
| Most of the area is tossing a pretty fair reflection. |
 |
| Getting to be a ten footer. Maybe a stripe under that body line? |
That thin spot is still there. I remember once a long time ago my Dad suggested that I could cover up a blemish on my old motorcycle's gas tank. He said "why not cover the area with a sticker or something?" Of course I immediately rejected that idea. Now almost fifty years later I can see the merit of the idea. I could put a side stripe on the side of the car that would cover the worst spot. I saw some of those stripes for sale at Pep Boys. A flat black stripe might look kind of snazzy. I still have that Saleen decklid wing I want to use. Maybe, Maybe...
Now that the spots are touched up, I polished out the head lamps, tail lamps, turn signals and third brake light. A good washing, overall waxing, tire treatment, and interior cleaning will have the old Mustang standing tall. I will usually cover my car with a cheap, Budge brand car cover. I also use one of those Auto dusters every day before I cover up the car. I do know and accept that those cheap covers combined with dust and grit will cause minor scratches to the finish. However, I will chance that over ultraviolet induced fade and bird crap and sap that can fall on my cars from the trees I have to park under. So far I've had pretty good luck.
Now what to do about those worn and cracked seats? Chain auto store seat covers ARE pretty ghastly. What to do?
No comments:
Post a Comment