
Let's get those carbs back on. The first step in the process.

Things are about to get much more technical, I've been working on my stable of cars on multiple fronts.
It's been months since I last uncovered this car. The good news is that the tarps I covered the car with have been very effective keeping rainwater off of it.
I'd been ready to get started but I hurt my hand bad enough that I had to wait for it to heal well enough for me able to handle the job. I caught my hand in a shed door and tore up the skin on one of my fingers pretty badly.
I've learned of a company right here in Calif. that can re-sleeve my brake components. At least the wheel brake cylinders. I will have to contact them directly to ask about the master cylinders. The company is in So Cal near Ontario, in the city of Upland.
Maybe this will cut the costs of the brake system rebuild to a reasonable amount. We'll see.
First thing though, is to get the carbs back on.

As you can see the location of the carb mounting nuts has been clearly established and flagged. It seems silly but sometimes the loss of something small like mounting fasteners can bring a project to a complete halt.

It has been quite a while since I removed the carbs (years!) and I took some time think about their re-installation.
It looks like I can bolt on the front carb first, while connecting the fitting on the bottom of the starting carburetor to the manifold. That might take a bit of wrangling. It did take a little bending of the mixture pipe.
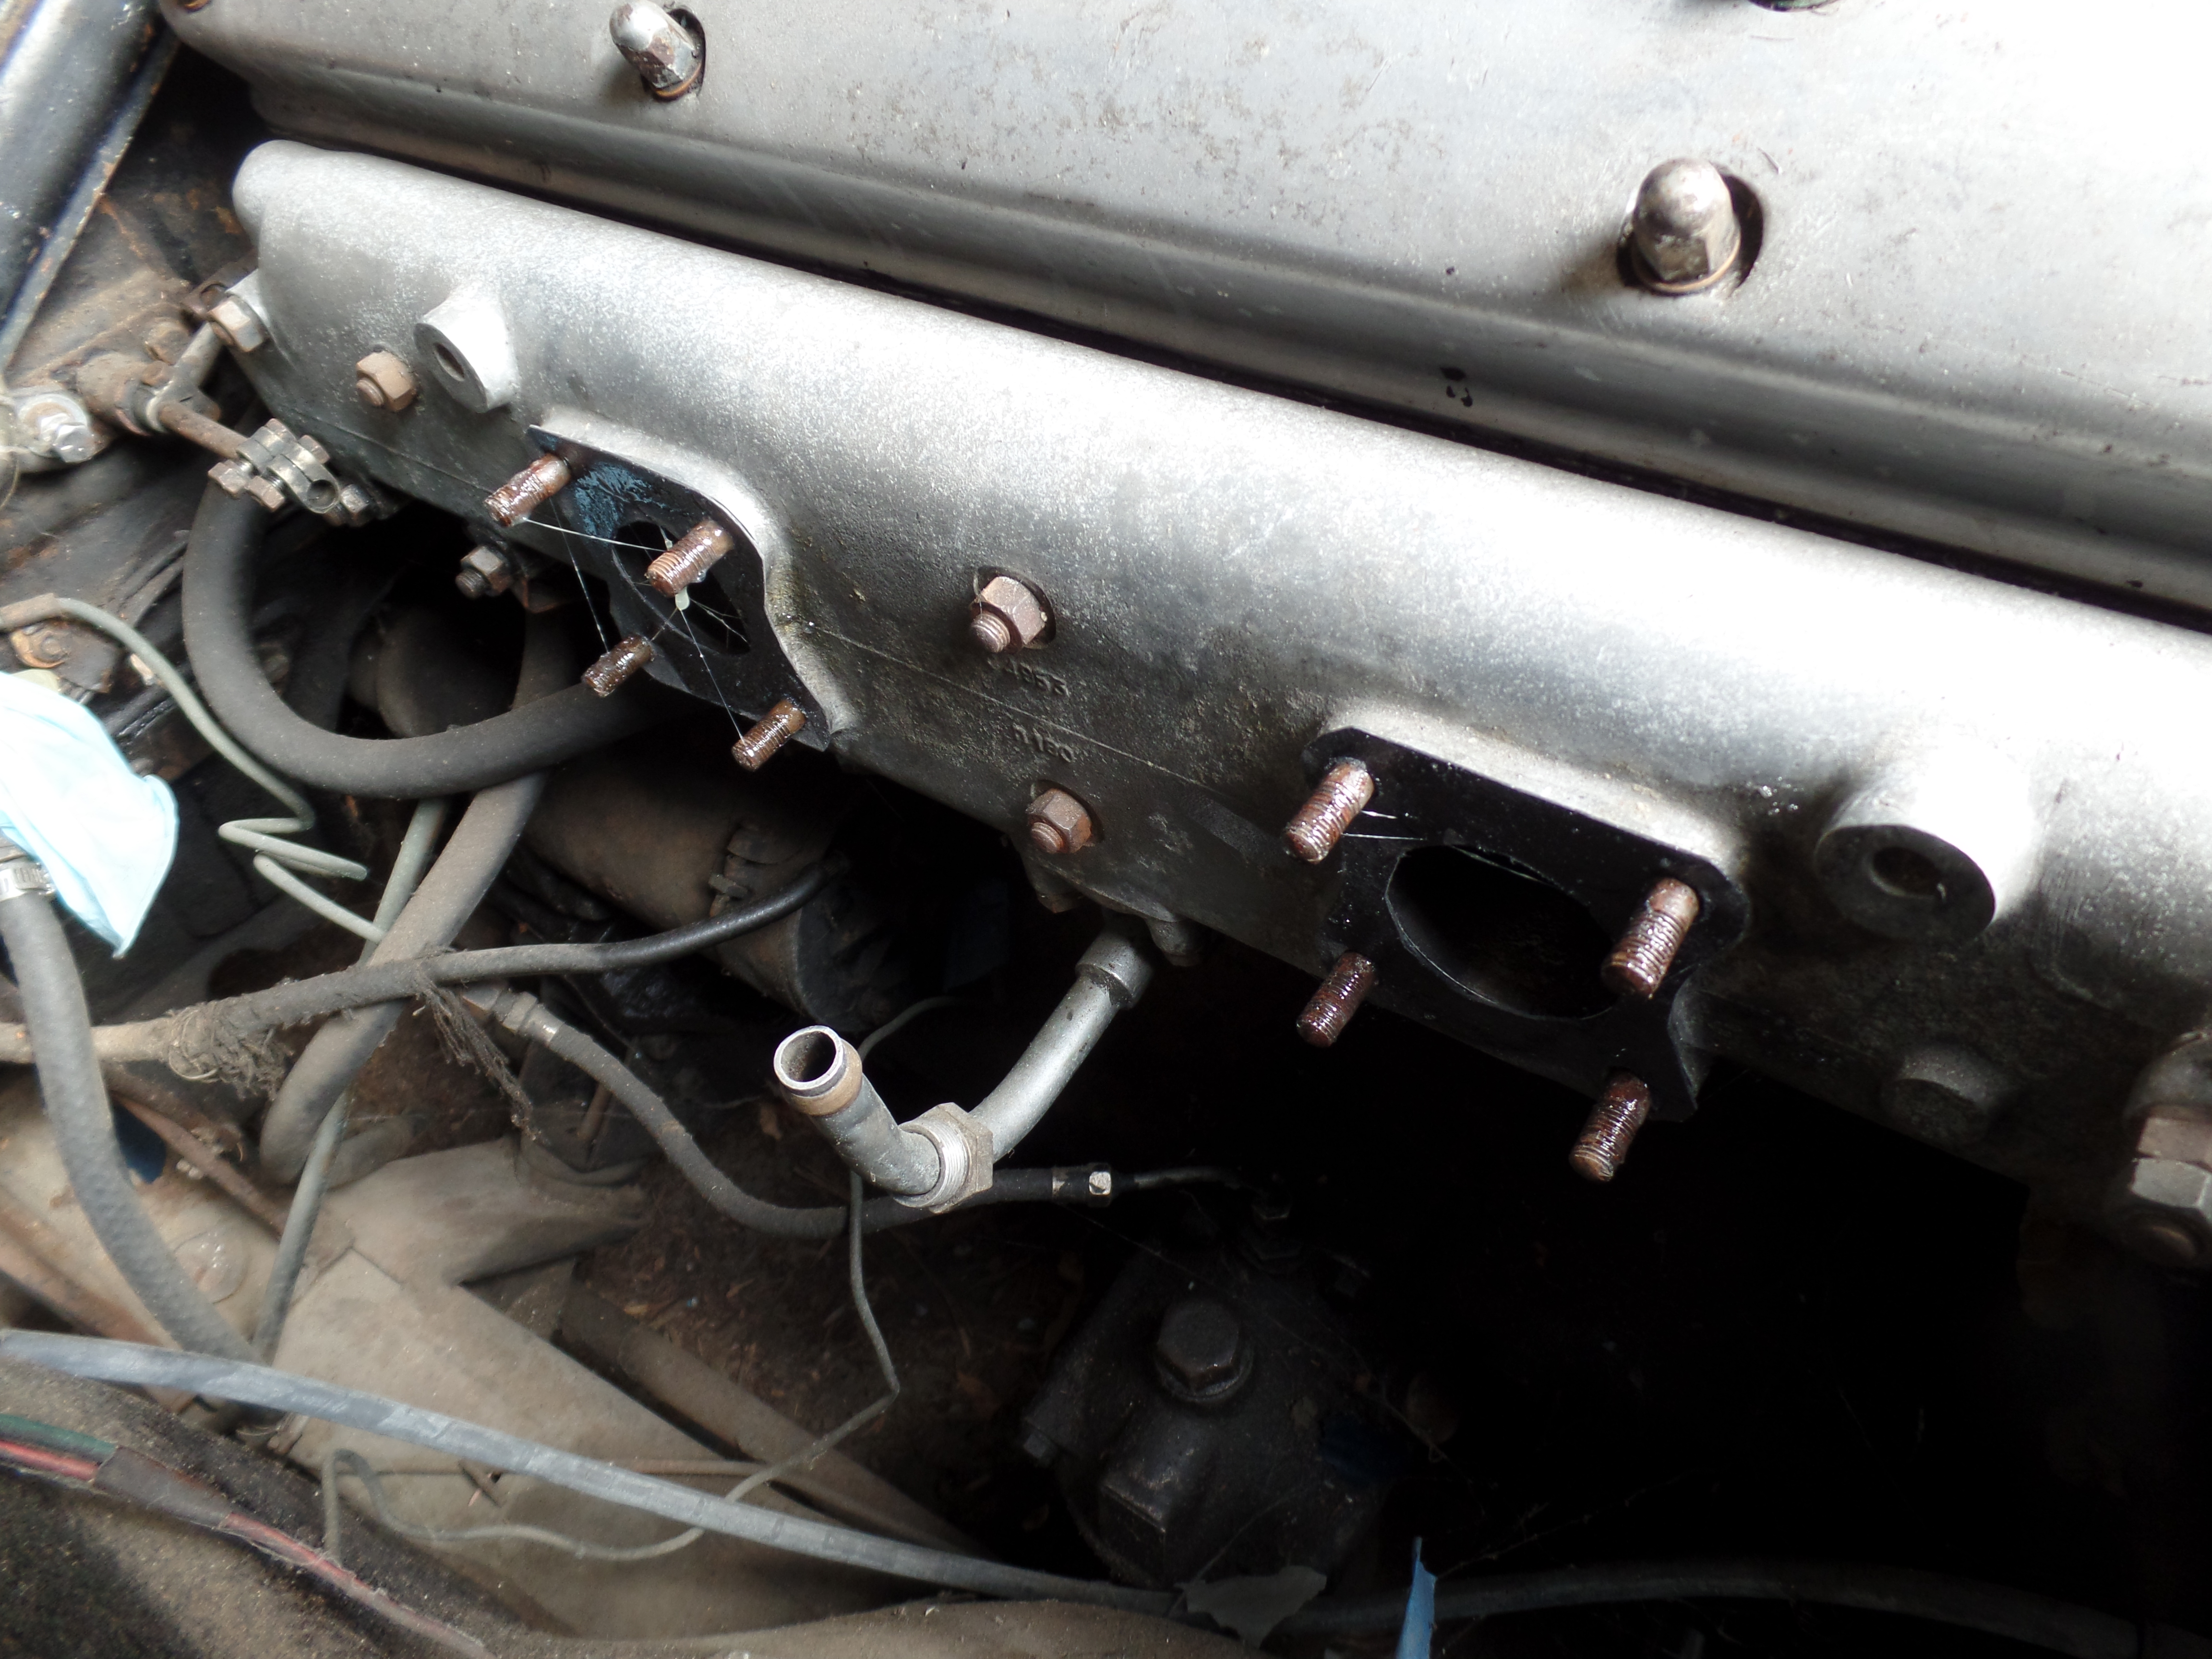
Those are my hand formed gaskets. That pipe is for the mixture of the starting carb.

The forward carb is now in place. I had to bend the mixture pipe a bit to get it aligned correctly. I didn't want to risk fouling the threads of the fitting. We usually think that inline engines have a lot of working room under the hood. The horizontal carbs sticking out of the side of the engine makes things tighter than you might imagine. The carbs have the bottom two mounting nuts as a bit of a stretch, and I can't see them as I start them, without using a mirror. Instead it's done by feel. Luckily I didn't drop any nuts in the dirt under the car. I'm not sure what that ventilated green box is for, I first thought it has something to do with the aftermarket transistorized ignition system that the original owner installed. It cuts into the access room as well as my arm as I maneuver in the area.

Gaskacinch is one of my go to sealants. I prefer it to most RTV type sealing compounds. It dries quickly and will hold gaskets in place, doesn't squeeze out of the joint, and disassembles easily. It looks and feels like rubber cement. Maybe that's all it is. It does resists solvents and water so maybe not. A little goes a long way so a little can can last for years. That finned box is the other unit of the transistorized ignition. Looks a lot like an MSD unit.

This wrench is a life saver. It's a ratcheting open ended wrench made by the Alden company. It was designed for the aerospace industry. It ratchets with only a 30 degree swing and the spring loaded jaws grip the nut. I bought a set of these twenty years ago when I was replacing the alternator on my NorthStar Cadillac.

This is where I finished on the first day. I stuck a rag in the carb throats and covered them with plastic bags. It was only a couple of days later that I returned to the task,
After I got both carbs bolted on I had to fiddle with the throttle shaft connection. Part of the shaft is a spring that is clamped onto the solid sections. The junction couldn't be clamped tight enough. I loosened and removed it, then pried it open a bit. After re-installing it I cut a shim from a soda can and slipped it in before trying to tighten the connection. The shim did it's job and tightened up the joint. ( For a discussion of aluminum can shim material refer to "Zen and the art of motorcycle maintenance.")
I found that it was was necessary to align the shaft with the proper position of the gas pedal.

Starting fluid is seldom used on modern cars. If you're trying to start up a car that's been sitting for a long time, it can come in handy.
I thought that I would try to get the engine to fire only using starting fluid. It would only run for a moment. If I was successful, then the plan was to fill the float chambers of the carbs with fuel, then use starting fluid again.

I pulled out my garage fire extinguisher and added the smaller extinguisher from the XJS. I wasn't that worried, as I was using starting fluid, which is ether. It is extremely volatile and it will evaporate rapidly, unlike gasoline. But it never hurts to be careful, especially when I later move on the gasoline.

Of course I didn't have a battery for this job. I had an old used battery that I had bought for the XJS. It used to hold a good charge, but no longer. I had considered buying a used or reconditioned battery from the same vendor here in San Jose, if he's still in business. That's where that old battery came from. Or I might buy one from Pick and Pull. The best course of action seemed to be buying a new battery for my Mustang then using it's old battery for the Jag. I know that this battery is still pretty good and my Mustang will get the benefit of a new battery. The battery in my Mustang will be four years old in November.
I raised the throttle pistons and held them open with a length of fuel line. Then I sprayed a couple of good squirts of starter fluid into the throat.
I had already hooked up the good battery so I pushed the starter button. The engine spun over but there was not any indication of combustion. Not even a pop or cough. I gave it another try holding down the accelerator.
Nothing happened. I wondered if I had spark. I hooked up my remote starter button and spun the motor while holding the spark plug lead a short distance from the cam cover nut. No spark at all! That might be the problem. I removed the distributor cap to clean the points by burnishing them with a match book cover. and a spray of electrical contact cleaner.
The previous owner had added a transistorized ignition booster. These were popular before the advent of factory pointless ignitions. The lower voltage extended the life of the points and the spark voltage was amplified at lower and higher rpm. I don't know if the system still works, or if the extra connections are making good contact.
There were a lot of extra spade connectors and a ground connection on the coil and they looked kind of grimy. I pulled them apart and cleaned them with a wire brush. That didn't solve the problem. I found that the coil has a damaged terminal screw connector and that the coil lead was just stuck into the coil as it popped out as I was moving the coil. Only a couple of strands of wire stuck out of the end of the high tension lead. There wasn't even a terminal end.
Well, It's obvious that it wasn't going to fire today. I'm going to have to do some detective work and do a methodical check of the condition of each connection. I also have to find the wires that go to the distributor and coil and check for electricity then follow it's path.
It's called basic trouble shooting.
It would have been nice if it would have been easy, but that was just being a bit too optimistic. I've gotta get that spark present and accounted for.
No comments:
Post a Comment