Getting the '96 Mustang ready for possible sale.
 |
| The Mustang has been sitting on jack stands for a couple of days. |
Or at least for next year's registration.
As I said earlier, the CEL lit up on the dash. However, the car seemed to run as good as it ever has. I continued to drive it until I swapped places with the '06 to put a new set of tires on it. The CEL went out on it's own before I made the switch.
When it came out of the garage, the CEL promptly lit up again. I used a code reader again, I have to figure this out, registration is due soon. That means a smog test this year prior to renewal.
I put a code reader on it and came up with the codes PO136 and PO141. I looked in my Haynes manual and the codes were identified as oxygen sensor codes. It indicated a problem with the sensor heating circuit. This engine uses four O2 sensors, two upstream and two downstream. Which translates to ahead of, and behind the catalytic converter.
The manual didn't offer much of a description so I googled; "1996 Mustang 4.6 engine, what does a code of PO136 mean?" I found a lot of info. It indicated that it could be the wiring harness, a leak in the exhaust system, or a bad sensor. There were several videos about the repair/replacement process. I googled the same question about the PO141 code and the answer was similar.
My car has over 215,000 miles and I'd bet that the sensors were bad. My Brother had a '80 BMW 320i that started going through O2 sensors every 50,000 miles, so I guess that I've been lucky.
I went to my local O'Reilly's and found that they wanted almost 60.00 per sensor.
Then I looked on RockAuto. I believe in supporting my local businesses, but I already spent 200 bucks buying a battery at my local Indie auto parts store in June. I gotta find ways to save some money.
 |
| You can see the special socket on the right. |
Rock Auto had the sensors for about 24.00 a piece, so I thought it best to replace all four if I'm going to be under the car. I also decided to spring for the special socket. This is where Rock Auto got an extra bite out of me; extra shipping, since the items originate from different locations. That's something that you have to watch if you are buying several different items at one time. However the RA price was so much lower that it was still a good deal.
Today I switched out the Riviera and the '96 Mustang so that it would be ready to receive the sensors when they arrived.
First I have to deal with the sensors, then I'll get the oil changed, and have the smog check done.
While I was at O'Reilly's the young counter guy expressed some interest in my car after a bit of conversation I told him that I was thinking of selling the car.
Last weekend I brought my Mustang to a Cars and Coffee event in San Jose. Just before I was planning to leave I went and placed the for sale sign on the dashboard. I returned to the car and saw an older guy photographing the for sale sign. I engaged him in a conversation and learned that his Son in law was looking for a car. His Daughter in Law was with him, so she got to see the condition and we discussed the car.
I would prefer that I replace the sensors, change the oil, and perform the smog check before I put the car up for sale. The expenses would be approx 130.00 for the sensors, fifty bucks for the oil change, another 50 bucks for the smog test, and 160 dollars for the '25 registration fees.
I have priced the car at 3,000 dollars which I feel is a fair price even after I spend this money on the car. Even if I don't end up selling the car, I still need to do this stuff anyway.
I watched a few videos on YouTube, which gave me an idea on what to expect. Except that one the videos showed a car that had changed the stock exhaust manifolds for headers and a front sensor bypass. Also the car in the video was a coupe, while my convertible has a large cross brace that ties the front cross member to the rocker panel area. This brace makes access pretty tight around the passenger side upstream sensor.
 |
| You can see the front end of the brace. |
I initially thought that I would remove the brace to gain more access, it is held on with quite a few bolts, mostly 13mm. However at the rocker area there was a big plate under a plastic cover with a 10mm bolt as well as three 13mm. bolts. I tried to loosen the 10mm bolt, but it was very tight, and while it moved a bit, I was afraid that it might snap off. I don't like to break bolts and decided to try to remove the sensors with the brace still in place.
The only location with really restricted access is for the passenger side upstream sensor. This is where the starter motor is located. I easily removed and replaced the driver side upstream sensor since I could insert my hand into the space.
 |
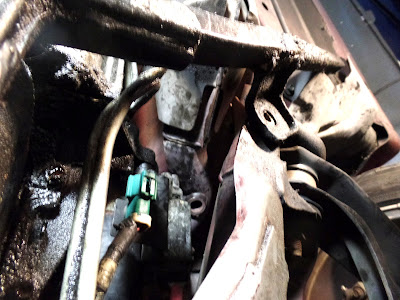
| Below the green connector and above the cross member you can see the bung where I unscrewed the sensor. |
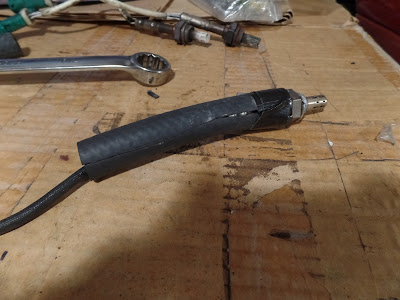
Removing the sensor was pretty easy as I have a few large 7/8 combination wrenches that could reach the sensor. I can insert the sensor in the hole easily, using the wires to position it. The problem is to start the sensor threads into the bung. Like a spark plug, you want to make sure that it is properly threaded by using your fingers. I tried turning it by twisting the wire harness attached to the sensor, but that didn't work as it's not stiff enough. The problem is to hold it in place, and turn it by hand. Unfortunately, I can only get the index and middle finger of my right hand into the space.
 |
| Peek a Boo, I see you! I just can't reach you. |
Can I refer to a shop manual for handy tips to make the job easier? Maybe not this one.
 |
| These Haynes manuals are pretty useless. |


No comments:
Post a Comment