After the bumper re paint, taking care of this and that, between supply chain issues and the rainy weather! I have been working on this post for over a month, Please forgive me if it's a bit disjointed.
 |
| Really, who's going to be looking down here? |
 |
| It's a lot like using a pop rivet |
 |
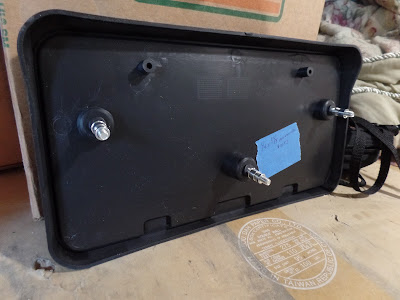
| First I drilled the existing holes to the appropriate size. |
 |
| The threaded inserts are visible on the new bolts. |
 |
| This is the black edging that will replace the chrome type. |
 |
| I think that it looks more subtle. |
 |
| While I was at it, I gave a little love to the Flex. |
Rub a dub dub, it was wash day for my fleet. For at least two of my vessels.
I had moved my Mustangs out of the garage into the driveway so that I could clean the garage and put away the Christmas decorations. That meant that the Flex and Navigator had to be parked at the curb. The truck was parked out on the side street.
The biggest issue with parking my cars at the curb is that there are two enormous trees in the green strip. Large trees mean that a lot of birds spend time in the branches. Lots of birds means lots of bird poop.
The Navigator escaped the worst. The Flex was hit many times and it had dried into quite the mess.
I noticed that there was a somewhat hazy appearance to some areas of the left side. I know that the seller had taken the car in for a Blue Coral treatment, and that it hadn't been polished or waxed before this. After wiping it down with the waterless wash, the surface looked kind of hazy. I tried some Meguiar's cleaner wax on the area and it cleared off the haze and the original paint turned nice and glossy. I will eventually polish and wax the entire car. After cleaning the windows and detailing the wheels it was looking good. That was on Saturday, unfortunately it rained hard on my trip the next day to Sonoma County!
As I said the poor Flex got nailed by the birds. I used the left over wash water and worked on each "spot" individually. I soaked them and let them set, coming around to each spot several times. Some washed off completely, some started to dissolve, and some were quite stubborn. I didn't have a problem with taking the Flex to the local brushless car wash that I use. I tip the operator conspicuously and they put a lot of extra effort into spraying off the spots before it goes through the machine. After I returned home I found that while some spots remained they were quite soft. Using a suitable implement I sprayed the area with water less wash and carefully scraped off what had survived the wash. Then I cleaned the Flex overall again.
The Flex is a very good looking car, it is my newest and lowest mileage vehicle, and it is one that I'm still making payments on! It behooves me to take care of it. I knew that I was taking the Nav on this trip, so I decided that I would cover the Flex while it sat idle. I bought the cover last year, but had only tried the fit once. It's not easy putting the cover on a big boxy vehicle. My highest priority is to protect the paint from bird attacks that can damage the paint.
I have been driving the Nav a lot since I bought it, which means that my other cars just sit. It's not that I don't like the Flex, it's just that the Nav was bought as a hobby car for emotional reasons, and let's face it, it's a Lincoln! It's just at a higher level, even though the Flex is 12 years newer. I will start using the car cover on the Nav and start putting the other cars back in the rotation.
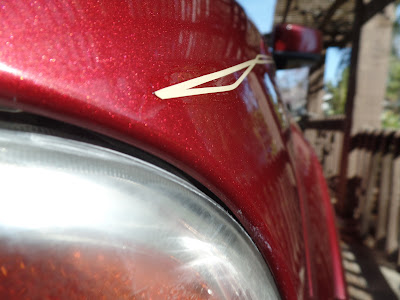
Those darned tape pin stripes! I have to be careful with them. I suppose that it wasn't the best idea to have them applied just as the monsoon season started. probably best to add them in the Spring when they can bake in the sun to cure the adhesive.
I plan to add some tape striping to my '06 Mustang, and I'll compare the results to the 200.00 dollar job I paid for. I found an unopened package of striping tape that I'd bought years ago in a box in the garage. If that doesn't work out, I've seen some striping tape at the auto parts store for 7.00! Quite a difference!
The red touch up paint showed up a few weeks after the narrow black protective side molding arrived. I had to wait for the weather to clear up to apply the touch up paint.
 |
| After the touch up the chips are not so noticeable. |
I had to wait a few days for the paint to dry, and then a few days for some good weather to attach the black moldings. I found that the molding is pretty narrow, kind of like a fettuccine noodle. It doesn't stay as straight as I would like. There is room enough to accommodate a 5/8 wide strip, so I may replace these later. I probably should have come up with some kind of guide or jig, but it will do for now.
 |
| The black moldings blend in pretty well. |
 |
| Looks okay, for now. Let's not make the perfect the enemy of the good enough. |
The tape pinstripes have proven quite troublesome. After the initial application, it took several trips back to the body shop before they fixed it to my satisfaction.
The paint shop has finally replaced the defective section of pinstripe tape on the Navigator. That took three visits, I think that they should have done it the first time. On the third visit they just added some new tape on top of the existing tape! When I saw THAT, I told the guy, "That's never going to hold, why not just replace this section?" So they finally did. I waited three days before trying to wash the car, I wanted to give the adhesive plenty of time to cure. I decided to wash it carefully, wetting it below the belt line by hand, avoiding the striping. I also washed the rest of the car, very carefully. It came out pretty good.
 |
| This is from the same company that is sending me the touch up paint. |
 |
| You can't even see the clear paint. |

.JPG)


No comments:
Post a Comment